Friday 26 October 2012

Print

Montessori Activity: Naming & Counting Number Rods


AGE: 3.5 - 5 years old

ACTIVITY DURATION: 15 minutes

OBJECTIVE(S):
1. To learn to count each number by a single object as a whole separate from others and understand the value of each number (i.e. that each number represents a quantity and distinct

2. To teach the names of one to ten in relation to quantities.

MATERIALS:
1. The Number Rods
2. 2 mats or trays

PRESENTATION:

Day 1: Name the Number Rods

1. Ask your child to spread out a floor mat.

2. Name the Number Rods, show where they are kept and have your child go and fetch them.

3. Have your child arrange the rods into starting with the red section first, from the smallest to the longest (as seen from picture above).

4. When the child is able to arrange the rods in stair formation, isolate the first three rods and teach the Three Period Lesson.

5. Put Rod 1 in front of the child and say its name several times: “This is one.” Touch the rod and count: “one”. Put aside Rod 1. Put Rod 2 in front of the child and say: “This is two.” Point and touch each section and count: “One, two.” Put aside Rod 2. Do the same for Rod 3. (Period 1)

6. Place the three rods in front of the child in mixed order and ask: “Can you give me Rod 1?” then Rod 3 and then Rod 2. Repeat until the child knows the rods by name. (Period 2).

7. Put a rod in front of the child and ask: “What rod is this? Can you count it for me?” Do the same for all three rods (Period 3).

8. Always end your lesson by placing the rods in order.

9. Do the same with Rod 4 – 10 three rods at a time. Depending on the child, teach this in a day or over a few days.

Day 2: Name & Count

1. Mix the Number Rods on the mat.

2. Ask the child for a specific rod and place it on an empty mat.

3. Let the child count the alternating color segment of each rod one-by-one by touching each partition of the rod hand-over-hand (this will help fix the repeated numbers in his mind and helps him associate the spoken number with the concrete quantity of segments.)

4. If he forgets some of them, repeat the Three Period Lessons.

Day 3: Identify Quantity

1. Mix the Number Rods on the mat.

2. Pick a rod and place it in front of the child, ask: “What is this?”

3. Let the child count it and tell you the name of the rod. Then put aside the rod.

4. Do the same for all the rods.

Day 3: Identify Rod in Order

1. Lay out the Number Rods in stair formation order on the mat.

2. Point to a rod in stair formation and ask the child to say the name of the rod.

3. Let him verify by counting it.

4. Do the same for all the rods.

Day 4: Identify Rod Randomly

1. Mix the Number Rods on the mat.

2. Let the child pick a rod, place it on an empty mat, and say its name.

3. Let him verify by counting it.

4. Do the same for all the rods.

VIDEO DEMONSTRATION:
http://www.youtube.com/watch?v=-sbZScRMS4w

CONTROL OF ERROR:
Color and irregular progression of length.

ADDITIONAL INFORMATION:
Our Number Rods arrived today from Absorbent Minds Montessori. It was a very small set, but I do not mind it, as we have limited space at home. However, I was a little disappointed that the red and blue colors were not as bright as the pictures shown from their website, but it does the job.

But J did enjoy it, so I could live with it. I made the Number Rods using lego bricks, but that did not quite work with Joshua, as he kept taking them apart. Joshua (3Y7M21D) tried this set of small, but real Number Rods this evening, and it was the first time we managed to go through the whole activity as it meant to be with the Number Rods, so I was glad. It was just at the right challenge for him. He made some errors using visual judgment of the length. He had to count the partitions to get the size right.

REFERENCES:
http://www.infomontessori.com/mathematics/numbers-through-ten-number-rods.htm
http://web.archive.org/web/20050212085156/http://www.ux1.eiu.edu/~cfsjy/mts/math/_link.htm
http://www.moteaco.com/albums/casa/casamath.html#anchor2979127
Basic Montessori Learning Activities for Under-Fives


10 November 2019 (3Y5M24D): I tried this with C for the first time together. She was not using it as it was intended. She put them together, she made the shape rabbit, that only she can recognize. Finally, I use Montessori mystery bag and she finally use it as what it was intended for, by picking out a rod in the bag and saying its number.

10 November 2019 (3Y5M24D)


Sunday 21 October 2012

Print

Montessori Activity: Binomial Cube


Age: 3 – 3.5 years old

Activity Duration: 5 - 15 minutes

Objective(s):

1. Visually introduce the child to the concept of cubes of binomial, while providing a fun challenge. 
2. To develop the child’s perception of 3-dimensional patterns.
3. To prepare the child for mathematics, especially algebra, through the cube’s visual representation of the following algebraic formulas:  (a+b)3 =  (a+b) * (a+b) * (a+b) = (a2+ab+ab+b2)(a+b) = (a2+ 2ab+b2)(a+b) =  a3+a2+2a2b+2ab2+ab2+b= a3+3a2b+3ab2+b3

Materials:

1. The Binomial Cube
2. 1 mat

Presentation:

1. Name the Binomial Cube and show the child where it is kept.

2. Disassemble the cube by taking out the prisms one-by-one and layer-layer.

3. Arrange them in order on the mat.

4. Say: “We are going to build the Binomial Cube” and start by placing the red cube into the back left corner of the box.

5. Point to the sides of the red cube and say: "The sides are red. Look for a prism with a red side."

6. Place it with its red face touching a red face of the red cube. Do the same for the rest of the prisms with red side.

7. Place the blue and black prisms with the black faces touching the black faces of the red and black prisms.

8. Close the hinged sides of the box and place back the cover of the box.

9. Open the box and side hinges again, disassemble the cube and encourage the child to try to build the Binomial Cube.

Tips:

1. Encourage the child to build the Binomial Cube without the help of the picture.

2. Build the Binomial Cube outside the box. Once built, separate them in 2 layers so that the child can see that each layer has the same pattern.

Video Demonstration:

http://www.youtube.com/watch?v=D9Bvi00xlns
http://www.youtube.com/watch?v=fJcXtCiNrPI
http://www.youtube.com/watch?v=cgVJzTMEvXE
http://youtu.be/VJNtEndiXQg

Control of Error:

If the cube is not formed and the box cannot be closed properly.

Additional Information:

A little late with this, J (3Y7M) tried this activity for the first time on 12.10.2012. He could build it.

References:
http://www.infomontessori.com/sensorial/visual-sense-binomial-cube.htm
http://faculty.fullerton.edu/syen/mts/sensor/6.htm
Basic Montessori Learning Activities for Under-Fives by David Gettman


Updates 30 Nov. 2013


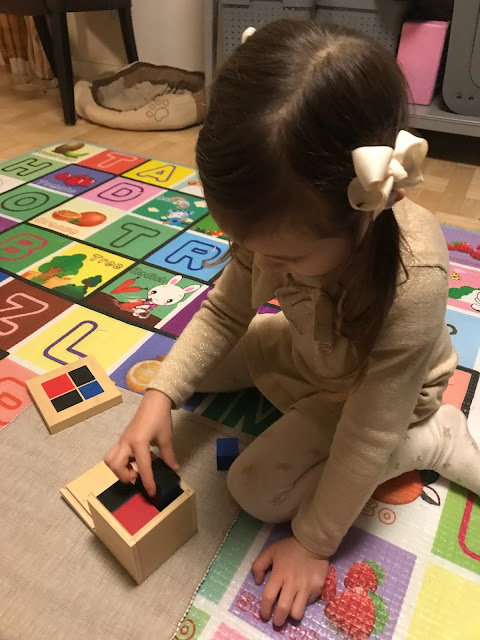
5 Jan 2021 (5Y7M): Baby FECS demonstrating how to build the binomial cube for her friends


Saturday 20 October 2012

Print

Montessori Activity: Knobbed Cylinder Blocks


Age: 2 – 2.5 years old

Activity Duration: 5 - 15 minutes

Objective(s):
1. To help develop the child’s visual discrimination of size.
2. To prepare the child for writing through the handling of the cylinders by their knobs.
3. To prepare the child for mathematics.

Materials:
4 blocks of 10 cylinders each consisting of:
- cylinders which increase in diameter and height (Block 1)
- cylinders which increase in diameter, but height remains unchanged (Block 2)
- cylinders which increase in diameter, but decrease in height (Block 3)
- cylinders which increase in height, but diameter remains unchanged (Block 4)

Presention:
1. Name the Cylinder Blocks and show where they are kept. 
2. Take out the cylinders with three fingers pincer grip and place them randomly in front of the child.
4. Touch and inspect the wells and replace the cylinders one-by-one back into the respective sockets.
5. Give the 3 Period Lessons on the relative sizes of the cylinders using positives, comparatives and superlatives: Thick and thin for Block 1, Large and Small for Block 2, Tall and Short for Block 4.
6. Encourage the child to try.

Video Demonstration:


Variations:
1. Remove all the cylinders out from the block, arrange them by their sizes without its block, then put them back to the sockets.
2. The child works with two, then three, then four blocks simultaneously.
3. The child arranges the cylinders in order with eyes blind-folded.

Language:
Talk about large, small, thick, thin, tall, short as you handle the materials.

Control of Error:
The cylinder does not fit well in the socket.

Additional Information:
A little late with this, Joshua tried Block 3 for the first time on 28.9.212 (3Y6M23D). It was too easy for him. He tried all 4 blocks together on 15.10.2012. It was a little challenging, but he could get all right.

References:
http://faculty.fullerton.edu/syen/mts/sensor/1.htm
http://www.infomontessori.com/sensorial/visual-sense-cylinder-blocks.htm
http://www.montessorialbum.com/montessori/index.php?title=Knobless_Cylinders


You can find cylinder blocks from amazon:


Updates on 26 Nov 2013 (4Y8MM21D)


Friday 19 October 2012

Print

Montessori Activity: Color Box 3


Age: From 3.5 years old

Activity Duration: 5 - 15 minutes

Objectives:

1. To teach color has different shades.
2. To train visual discrimination of color.

Materials:

1. 1 set of Montessori Color Box 3 (63 tablets comprises of 7 different shades of red, blue, yellow, purple, orange, green, gray, dusty rose, brown)

2. 1 floor mat

Presentation:

1. Name the Color Box 3 and show where it is kept.

2. Choose one set of tablets and put them on the mat.

3. Start with the darkest shade and put it on the top right of the mat.

4. Find the next lighter tablet and place it next to the previous one.

5. Continue with the rest of tablets until all 7 tablets have been graded.

6. Hold the lightest one and trace from the darkest to the second lightest tablet, then put it on the bottom of the line.

7. Give a 3 Period Lesson on the relative hue of color, say: "This is the darkest blue, lighter, lighter, lighter, lighter, lighter, lightest blue."

8. Let the child choose the next set of color.

9. Repeat step 3-8.

Video Demonstration:


Tips:
1. When the child is good at grading 1 set of color, have him grade two sets of color at the same time. Increase the set accordingly as he succeeded with more sets.

2. Grade the color set-by-set in the pattern of a sun (2 children can work together).

Video Demonstration:
http://www.youtube.com/watch?v=N5OG_t3mW7E
http://www.youtube.com/watch?v=PlnHB20nfas

Additional Information:
J (3Y7M14D) tried this for the first time today. He was rather frustrated with some of the shades such as orange, as he could not tell the difference between the hue. I must say that even I could not tell the difference. I bought the Color Box 3 from Kidadvance. I am very happy with all the rest of the materials I bought from Kid Advance, but definitely not their Color Box 3. I would not recommend this item from Kidadvance. The grey shade is one of the most well-made shades. Here J had success.

References:
http://www.infomontessori.com/sensorial/stereognostic-sense-geometric-solids.htm
http://www.montessorialbum.com/montessori/index.php?title=Knobless_Cylinders
http://faculty.fullerton.edu/syen/mts/sensor/19.htm
Basic Montessori Learning Activities for Under-Fives

Print

Montessori Activity: Geometric Solids


Age: From 2 to 3.5 years old

Activity Duration: 5 - 15 minutes

Objectives:
1. To sensitize the child to the geometric solid shapes he sees around him.
2 To prepare the child for geometry.

Materials:
1. 1 set of Montessori Geometric Solids (10 pieces) consisting of ellipsoid, ovoid, sphere, cube, cuboid (rectangular prism), cylinder, cone, triangular prism, triangular pyramid and square pyramid.

2. 1 basket to contain 3 solids

3. 1 set of flash cards showing the names of the shapes (you can make this yourself)

4. 1 blindfold

5. 1 cloth (optional)

6. 1 tray of salt, rice or sand (optional)

Directions:
1. Name the Geometric Solids and show the child where it is kept.
2. Ask your child to bring over the box and have him sit to your left.
3. Place 3 basic shapes on the basket: Sphere, cube and cylinder.
4. Feel each of them and do the 3 period lesson by saying: "This is a sphere," and flash the card.
5. Hand it to the child to do the same.
6. Then ask: "Can you show me which one is the sphere?" and do the same with the rest of the solids.
7. Then ask: "Can you tell me what this is?" and do the same with the rest.
8. Cover the child's eyes with blind folder and give him a solid to him feel.
9. Ask the child which solid is in his hand.
10. Continue doing the same to all of the solids.
11. If the child forgets the names of the solids, repeat the 3 Period Lessons.

Tips:
1. Let the child choose 3 solids and cover them with a cloth. Feel the solid under the cloth and say out loud its name. Verify it by taking out the solid. It's the child's turn.

2. Take out three cards and ask the child to match the card with the solid.

3. Gently roll one solid in a tray of rice, salt or sand to see what forms it can make.

Video Demonstration:

Here is a video demonstration from North star Montessori Preschool:

http://www.youtube.com/watch?v=7zkYjj98z7c

Additional Information:
Some recommend to introduce this at 2 years old, some say from 3.5 years old. Based on my experience with Joshua, in my opinion, it is too late to start at 3.5 years old as it is too simple. I think it is best to start the simple solids already at 2 or 2.5 years old.

Joshua (3Y6M26D) tried this on 1.10.2012, which was very late. But better late than never! It went ok - Joshua was happy to go along and try this with mommy (which I am really thankful for his over-bearing towards me), but it is not a material he would request to repeat it by himself. Joshua is not a kinetic boy, thus tactile and sensory activities have not really been his favourite since he was a toddler. I am not sure if I would have fantastic results even if I have started this with Joshua at 2 years old.

But still, I think in his sub-conscious mind, he has learned a lot, and thus, I would not skip to Montessori sensorial activities just because Joshua is not a kinetic boy. Ok, here, I direct, not the child - a deviation from Montessori's philosophy. But the eastern philosphy is - Mommy knows best :-)

References:
http://www.infomontessori.com/sensorial/stereognostic-sense-geometric-solids.htm
http://faculty.fullerton.edu/syen/mts/sensor/20.htm
Basic Montessori: Learning Activities for Under-Fives

Print

Learning About Shapes with Shape Dominoes

 
Shape Domino from Hubbard's Cupboard
 
 
Age: From 3.5 years old (After the child has been introduced to shapes)
 
 
Activity Duration: 15 minutes
 
Objectives:
1. To provide a fun way to reinforce the learning of shapes
 
 
Materials:
1. Free Shape Domino printables from Hubbard's Cupboard
 
 
Directions:
 
1. Put down one domino card in the centre of the table or floor mat.
 
2. Divide the remaining cards equally among the players. (Any number of players you wish. In this case, we divided the cards amongst the two of us.)
 
3. Take turn to lay down a domino card next to the starting domino on either side of the first domino card, as long as the shapes on adjacent domino card match each other.
 
4. If you run out of cards that could match the shape at either end of the domino cards, you forego your turn.
 
5. The first player who finishes al his cards win.
 
Tips:
 
While playing this game, repeat the name of the shapes and encourage your child to do the same.
 
Additional Information:
What I like about the shape dominoes offered by Hubbard's Cupboard is its simplicity. The lack of colour is a plus for older toddlers or preschoolers, as it helps the child to focus on matching the shapes, not colour. It provides a fun way to match the shapes.
 
I tried this for the first time with Joshua (3Y7M14D) today and we had a good time. He told me that he has played this game before in his kindergarten as well, but it was car dominoes.
 
References:


Friday 5 October 2012

Print

J's Lunchbox


J's lunchbox consists of strawberries, rye bread, nuts, cucumber, grapes and red pepper bells.

Monday 1 October 2012

Print

J's Lunchbox


 J's lunchbox consists of pear, carrot, edamame, pasta, green peas, boiled egg, cucumber and sauage on sticks.
Related Posts Plugin for WordPress, Blogger...

My Favourite Books

Montessori Materials